Quick Summary:
Neodymium magnets with countersunk holes are brittle; wrong screws or torque cause cracking. You must specify grade, temperature rating (N, M, H, SH…), coating (NiCuNi, Epoxy, Zinc), and tight tolerances (±0.05 mm) to prevent failure.
Always match the countersink angle (90°) and flat-head screw type, and request samples before mass production. Use the included checklist to cover all six specs and avoid costly OEM project delays.
Custom neodymium magnets with countersunk holes are the perfect solution for simple assembly needs, but only if they’re specified correctly. If the size, screw, or coating is wrong, you will end up with cracked magnets, failed assemblies, corrosion, or reduced holding force.
As a professional custom countersunk magnets manufacturer, I wrote this guide to go over the six main specs you’ll need to define for OEM projects: dimensions and hole geometry, magnet grade and temperature rating, tolerances, coating, magnetization direction, and screw compatibility.
It also clearly identifies common mistakes to avoid, such as ignoring operating temperature, using the wrong screw head, or skipping drawings. Produce your project with confidence using this checklist-based approach. Avoid problems and save time and money.

Why Getting Magnets with Countersunk Holes Right Matters
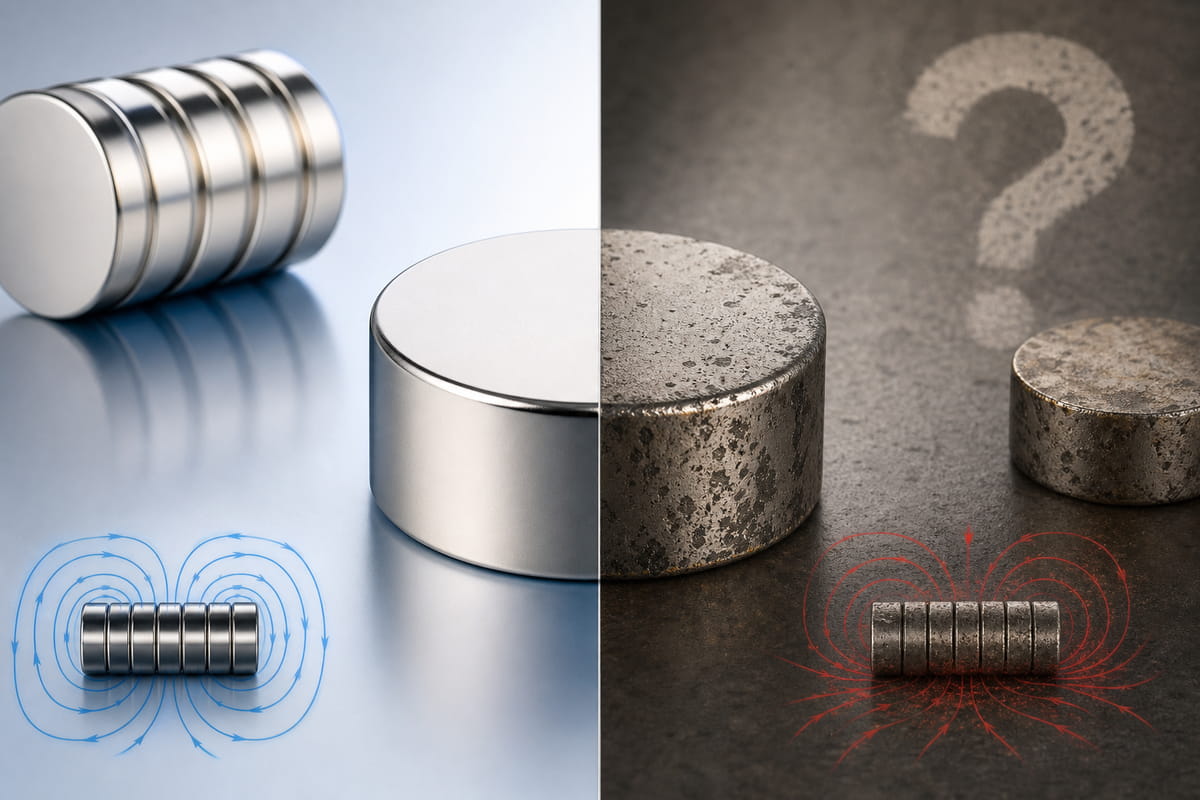
Neodymium magnets are powerful. They’re also brittle.
Add a countersunk hole to the mix, and you’ve created a stress concentration point. Screw it in wrong? Crack. Use the wrong screw? Crack. Choose the wrong coating? Rust.
The good news? Getting it right isn’t complicated. You just need to cover six key specifications.
How to Custom Countersunk Neodymium Magnets for OEM Projects?
Step 1: Nail Down Your Dimensions and Hole Geometry
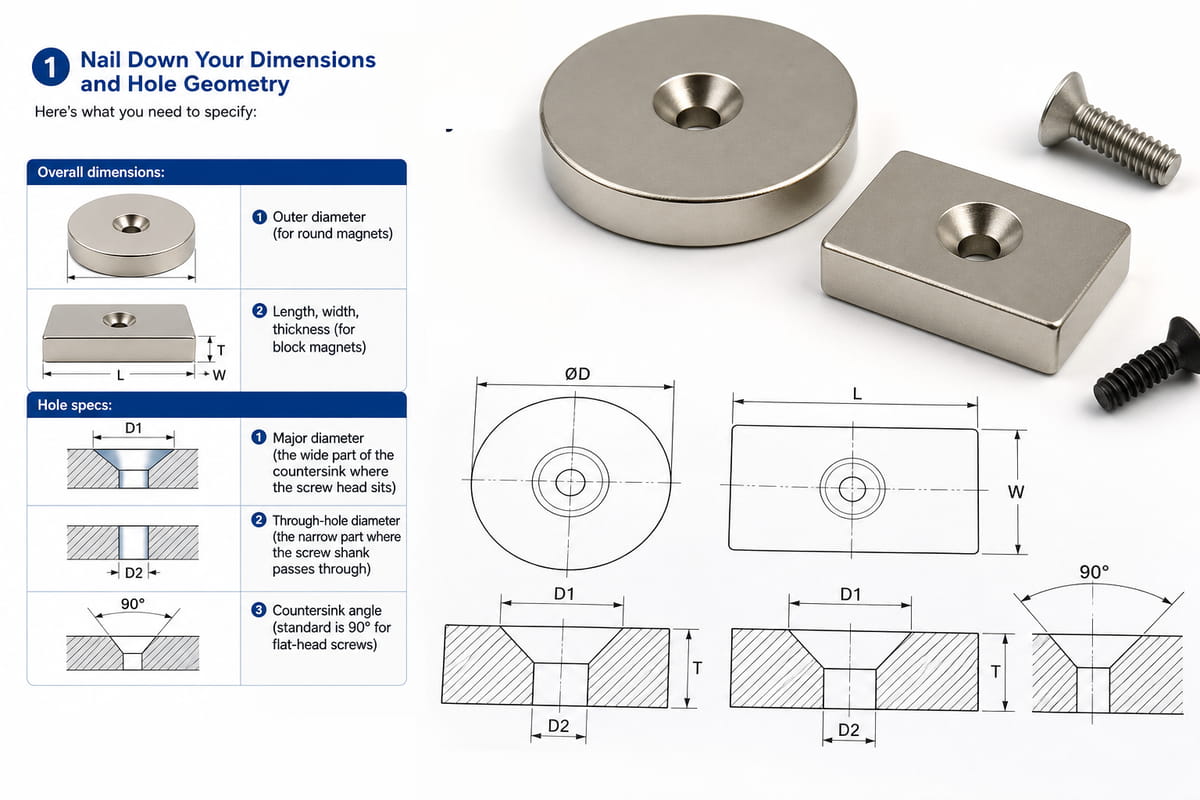
This is where most people mess up.
They order a magnet that’s “about the right size.” Then wonder why it doesn’t fit.
Here’s what you need to specify:
Overall dimensions:
- Outer diameter (for round magnets)
- Length, width, thickness (for block magnets)
Hole specs:
- Major diameter (the wide part of the countersink where the screw head sits)
- Through-hole diameter (the narrow part where the screw shank passes through)
- Countersink angle (standard is 90° for flat-head screws)
Pro Tip: The 90° countersink angle works with most standard flat-head screws. If you’re using something different, say so. Don’t assume.
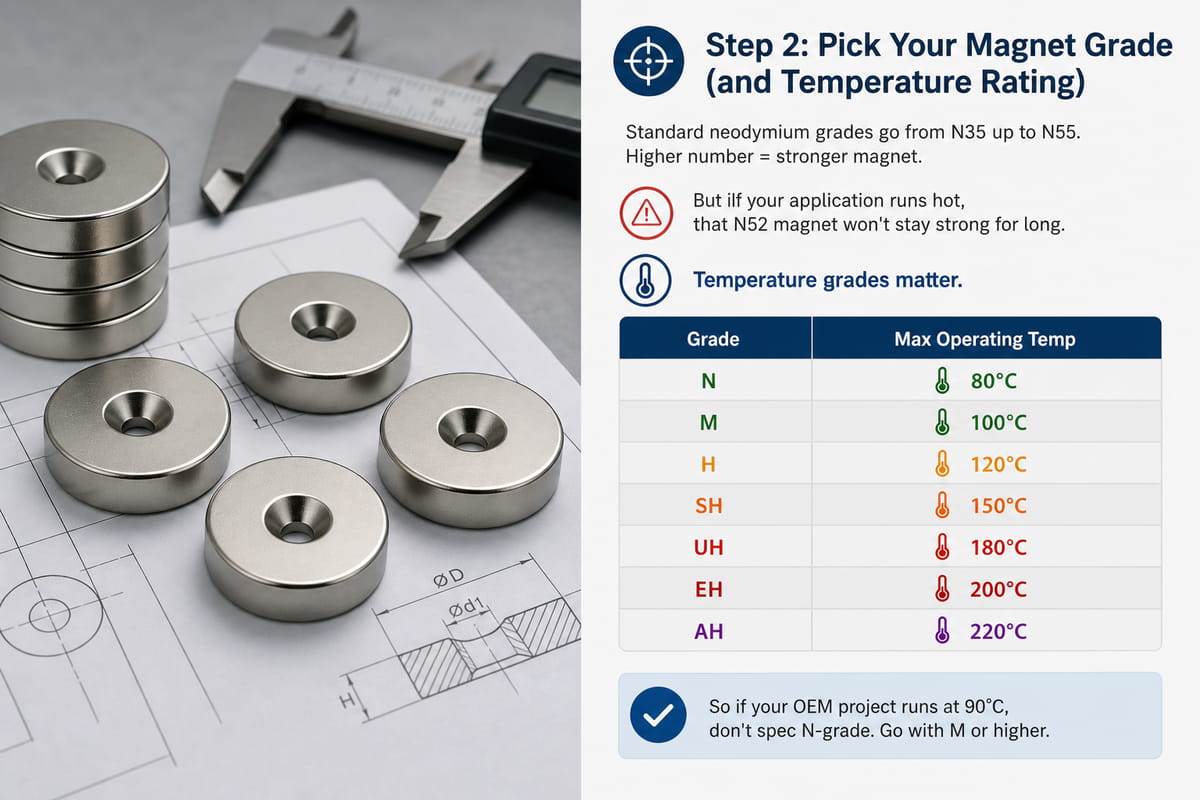
Step 2: Pick Your Magnet Grade (and Temperature Rating)
This is where things get interesting.
Standard neodymium grades go from N35 up to N55. Higher number = stronger magnet. Simple enough, right?
But here’s the thing:
If your application runs hot, that N52 magnet won’t stay strong for long.
Temperature grades matter. A lot.
| Grade | Max Operating Temp |
|---|---|
| N | 80°C |
| M | 100°C |
| H | 120°C |
| SH | 150°C |
| UH | 180°C |
| EH | 200°C |
| AH | 220°C |
So if your OEM project runs at 90°C, don’t spec N-grade. Go with M or higher.
In my experience, most OEM engineers forget this step. Then they wonder why their assembly loses holding force after six months.
Don’t be that person.
Step 3: Set Your Tolerances
Neodymium is hard. But it’s also brittle.
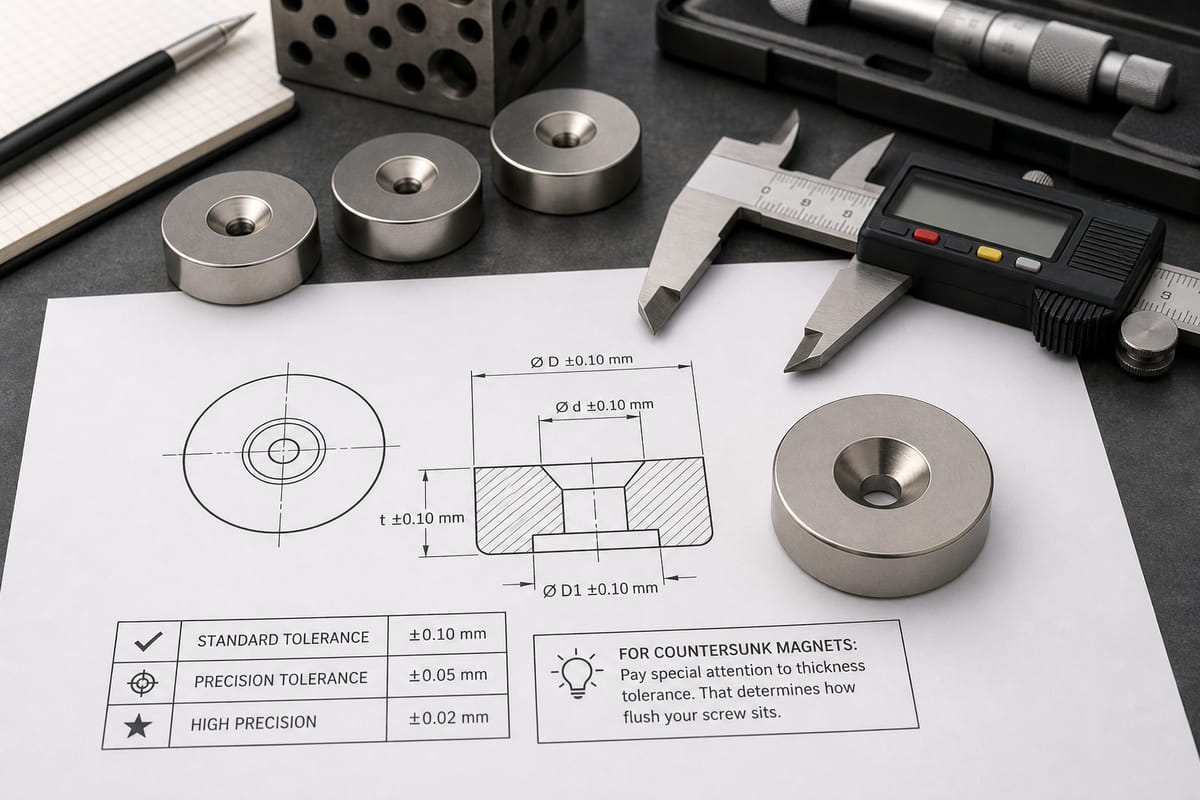
Set tolerances too loose, and your magnet wobbles in the housing. Set them too tight, and you risk cracking during installation.
Here’s what I recommend:
- Standard tolerance: ±0.10 mm (fine for most applications)
- Precision tolerance: ±0.05 mm (good for custom OEM magnets)
- High precision: ±0.02 mm (for tight fits in automated assembly)
For countersunk magnets, pay special attention to thickness tolerance. That determines how flush your screw sits.
Step 4: Choose Your Coating
Here’s something most people don’t realize:
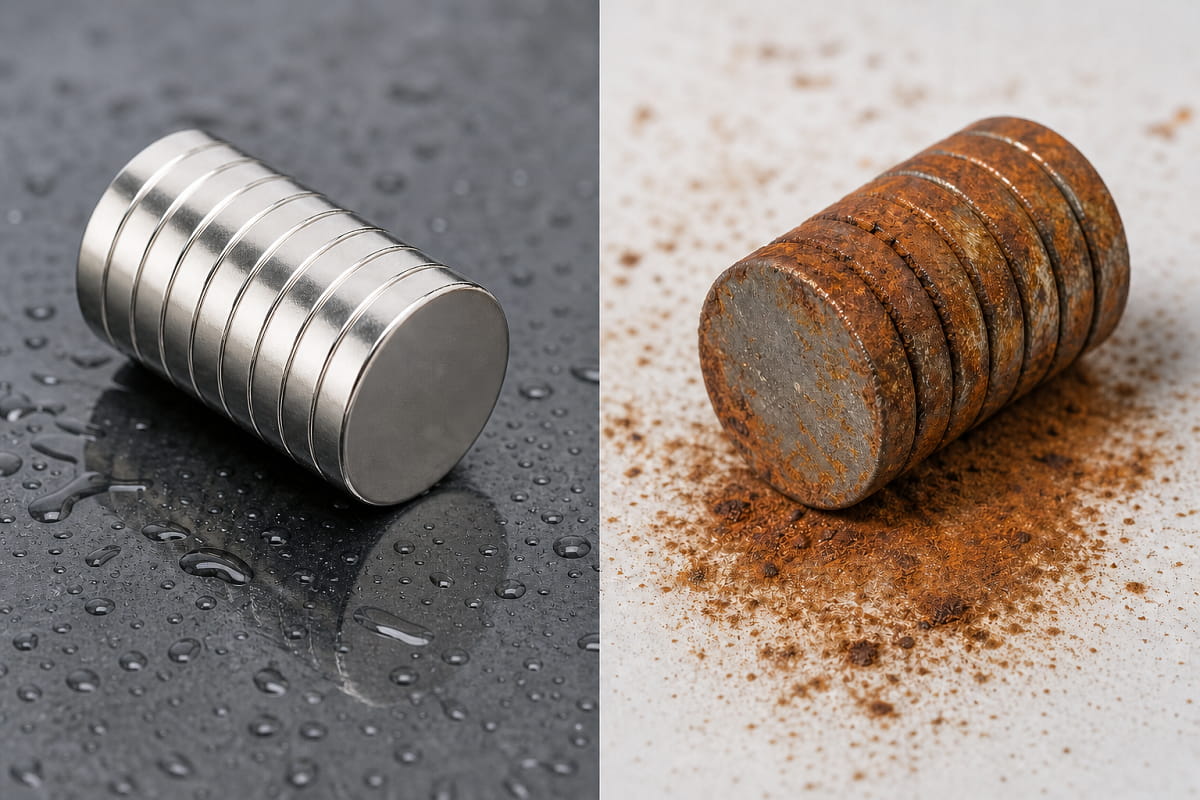
Neodymium corrodes. Badly.
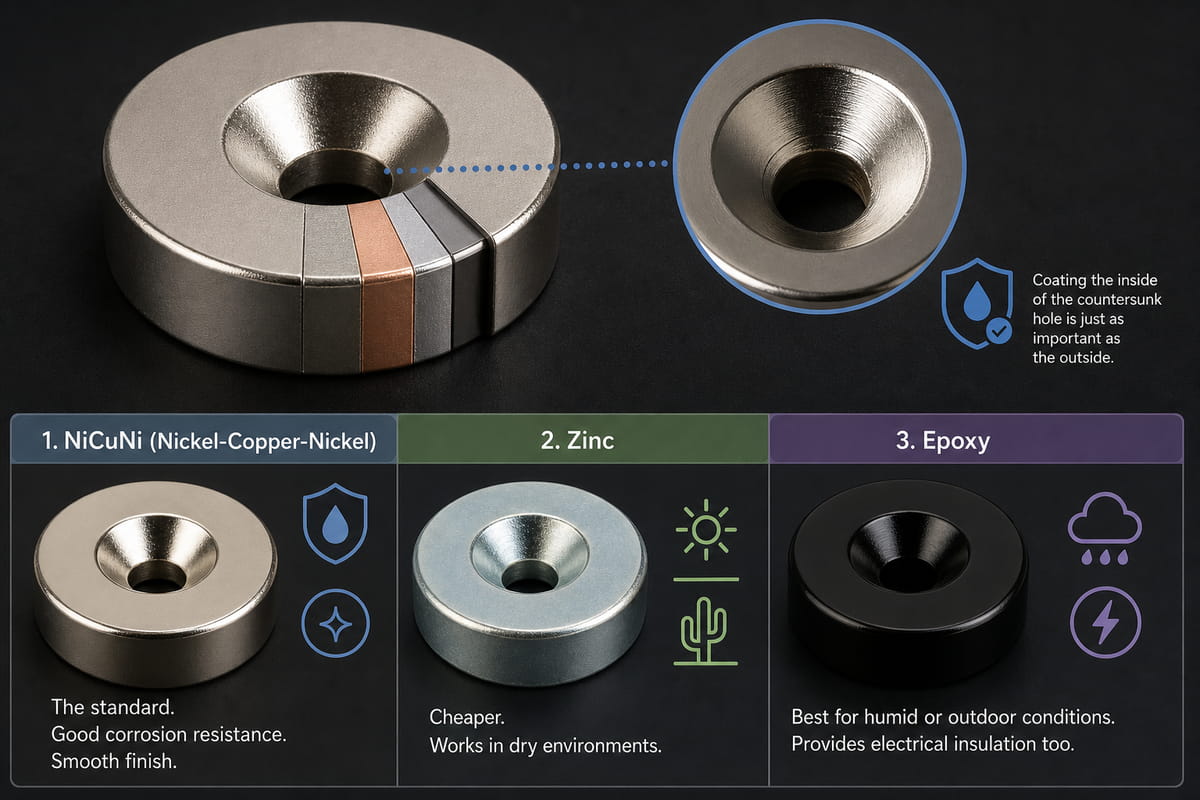
Without proper coating, your magnet turns into rusty dust. Especially around that machined inner wall of the screw hole.
Common coating options:
- NiCuNi (Nickel-Copper-Nickel): The standard. Good corrosion resistance. Smooth finish.
- Zinc: Cheaper. Works in dry environments.
- Epoxy: Best for humid or outdoor conditions. Provides electrical insulation too.
For countersunk magnets, coating the inside of the hole matters just as much as the outside. Make sure your manufacturer does both.
Step 5: Specify Magnetization Direction
This sounds obvious. But you’d be surprised how often it gets overlooked.
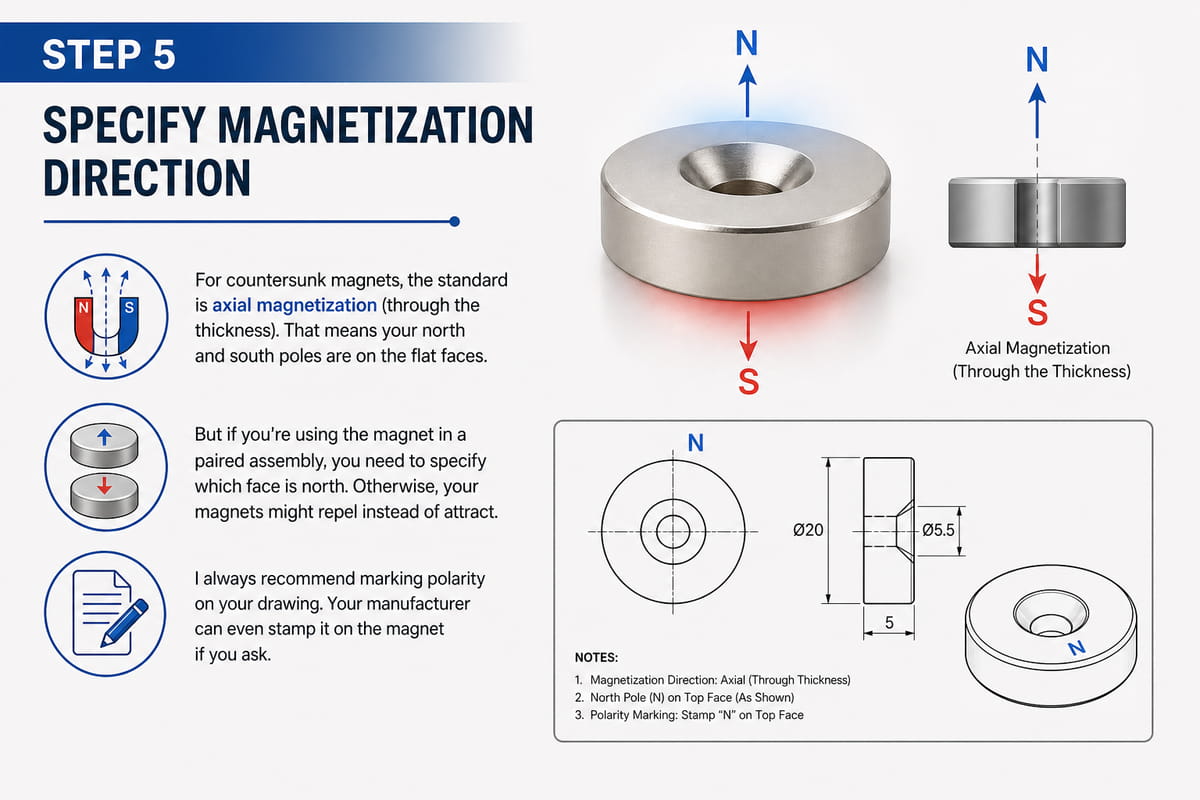
For countersunk magnets, the standard is axial magnetization (through the thickness). That means your north and south poles are on the flat faces.
But here’s the deal:
If you’re using the magnet in a paired assembly, you need to specify which face is north. Otherwise, your magnets might repel instead of attract.
I always recommend marking polarity on your drawing. Your manufacturer can even stamp it on the magnet if you ask.
Step 6: Match Your Screws
This is the step that causes the most failures.
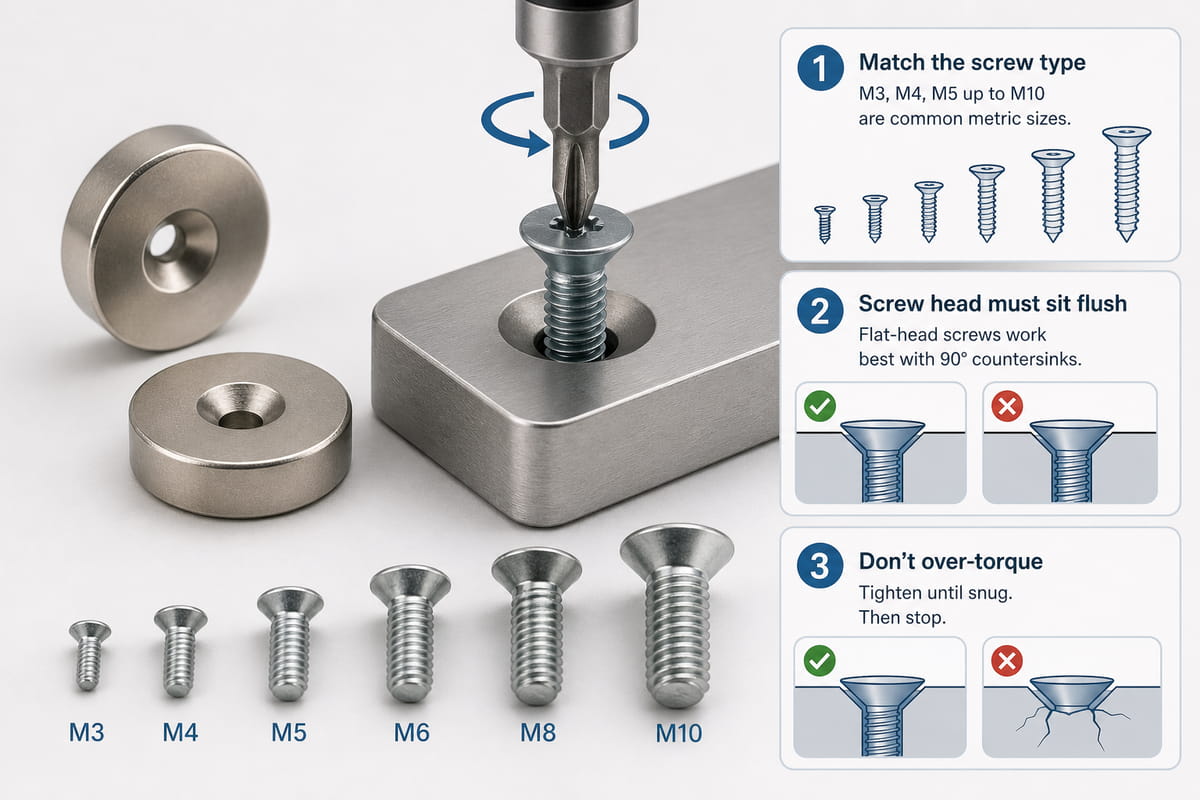
You can nail every other specification. But if you use the wrong screw, your magnet cracks during installation.
Here’s what to watch for:
- Match the screw type: M3, M4, M5 up to M10 are common metric sizes
- Screw head must sit flush: Flat-head screws work best with 90° countersinks
- Don’t over-torque: Tighten until snug. Then stop.
In one project I consulted on, an OEM client used hex-head bolts instead of flat-head screws. Every single magnet cracked within a week.
Don’t make that mistake.
Common Mistakes (And How to Avoid Them)
I’ve seen these errors dozens of times. Let’s save you the headache.
Mistake #1: Ignoring temperature specs Solution: Always check your operating environment. If it’s above 80°C, upgrade your grade.
Mistake #2: Forgetting about air gaps Solution: Account for paint, coatings, or gaps between magnet and target surface. They reduce pull force.
Mistake #3: Using the wrong coating Solution: Match coating to environment. Dry indoor = NiCuNi. Outdoor = Epoxy.
Mistake #4: Not providing drawings Solution: Send your manufacturer detailed engineering drawings. Include hole dimensions, tolerances, and polarity.
Quick Spec Checklist
Here’s a simple checklist you can use for your next project:
- [ ] Overall dimensions (OD, length, width, thickness)
- [ ] Hole geometry (major diameter, through-hole, angle)
- [ ] Magnet grade (N35-N55)
- [ ] Temperature rating (N, M, H, SH, UH, EH, AH)
- [ ] Tolerances (standard, precision, high precision)
- [ ] Coating (NiCuNi, Zinc, Epoxy)
- [ ] Magnetization direction (axial is standard)
- [ ] Screw compatibility (M3-M10, flat-head preferred)
Print this out. Use it for every order.
How to Work with Your Manufacturer

Here’s the thing about magnet manufacturers:
The good ones will ask you questions. The great ones will challenge your assumptions.
If your supplier just takes your order without asking about temperature or environment, that’s a red flag.
What you want is a partner who:
- Reviews your application before quoting
- Recommends the right grade and coating
- Confirms tolerances are achievable
- Provides samples before mass production
In my experience, OEM projects succeed when both sides communicate clearly. So don’t be shy about sharing details.
Final Thoughts
Look, specifying custom neodymium magnets with countersunk holes doesn’t have to be complicated.
Cover the six specs I outlined above. Match your screws. Get your coating right. Work with a good manufacturer.
That’s it.
The projects that fail are the ones where someone skipped a step. They assumed the standard magnet would work. Or they didn’t check the temperature.
Don’t let that be you.
So next time you’re working on an OEM project, pull up this guide. Run through the checklist. And order with confidence.
Because when you know how to specify custom neodymium magnets with countersunk holes for OEM projects, you save time, money, and a whole lot of frustration.
Sound good? Good. Now go build something awesome.